Option 1: Super simple 1-pot olla
This is the easiest version for beginners: one unglazed terra cotta pot with the bottom hole sealed, buried in the bed, filled with water, and covered.
Last year our raised beds struggled because we left for the cabin for a few days at a time and came home to dry, stressed plants. This year we are trying simple terracotta ollas to see if they can help hold things together while we are gone.
This project came out of a real failure. Last year the raised beds did not make it through our short cabin stretches the way we hoped. A few missed watering days was enough to knock things back hard, and it was frustrating to come home feeling like the garden had been punished for us leaving.
So this year we are trying a more forgiving setup. If you want less daily watering, there are 2 easy ways to do it. You can build a simple 1-pot olla, or a sealed 2-pot version that holds more water and stretches a little longer between refills.
The 1-pot version is the easiest beginner option. The 2-pot version takes a little more setup, but gives you a larger buried reservoir. Either way, the goal is the same: bury an unglazed terra cotta pot near your plants so moisture can slowly move into the soil where roots actually need it.
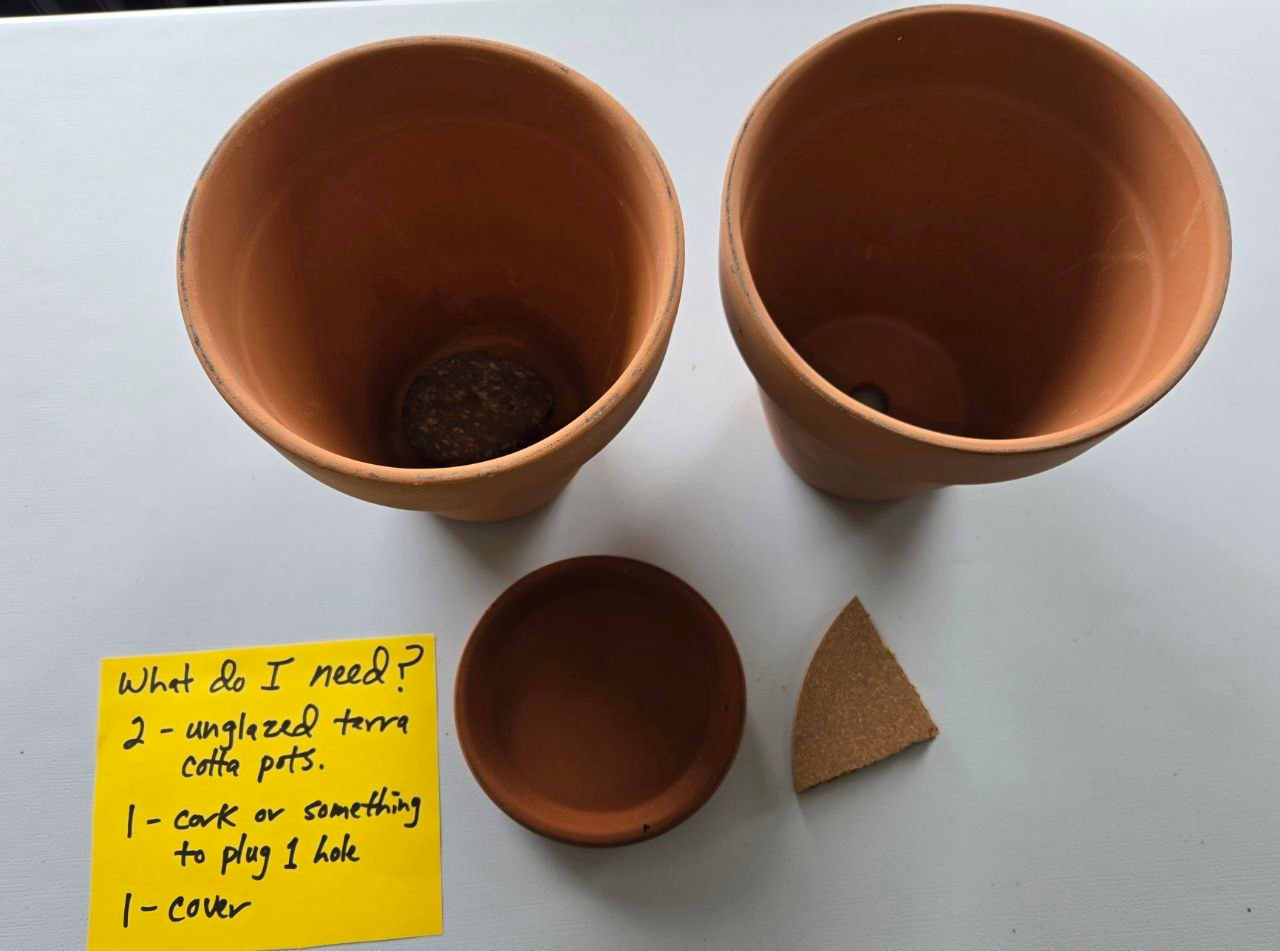
This is the easiest version for beginners: one unglazed terra cotta pot with the bottom hole sealed, buried in the bed, filled with water, and covered.
This version uses 2 matching pots sealed together to make a larger buried reservoir. It takes more setup, but can hold more water and help stretch out the time between refills.
Plug the drain hole in one of the pots.
Make sure the hole is sealed well so water does not run straight out of the bottom.
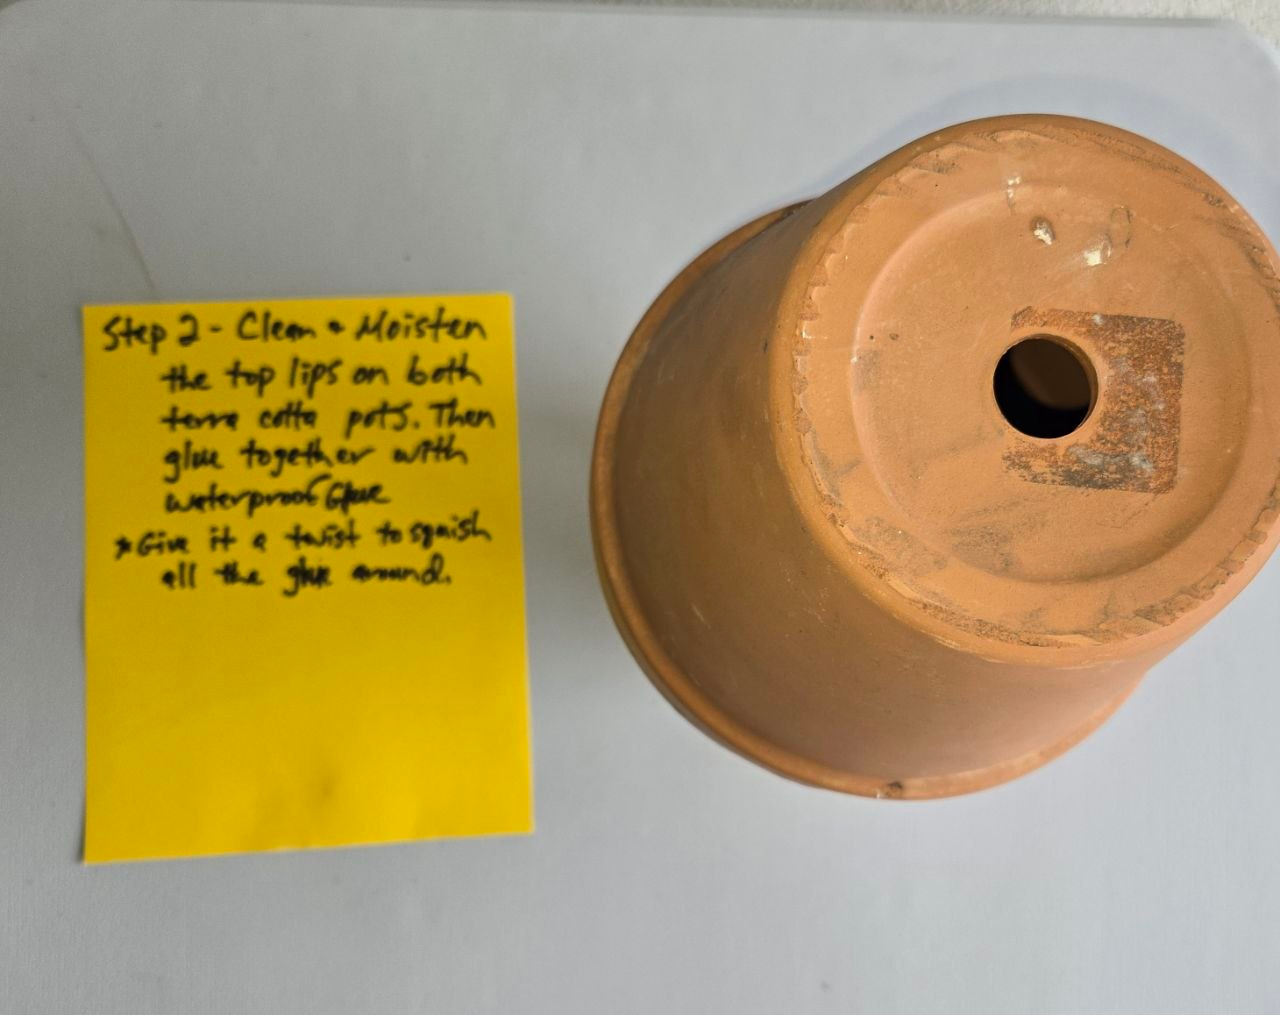
Apply waterproof glue around the rim so the two pots can be joined together.
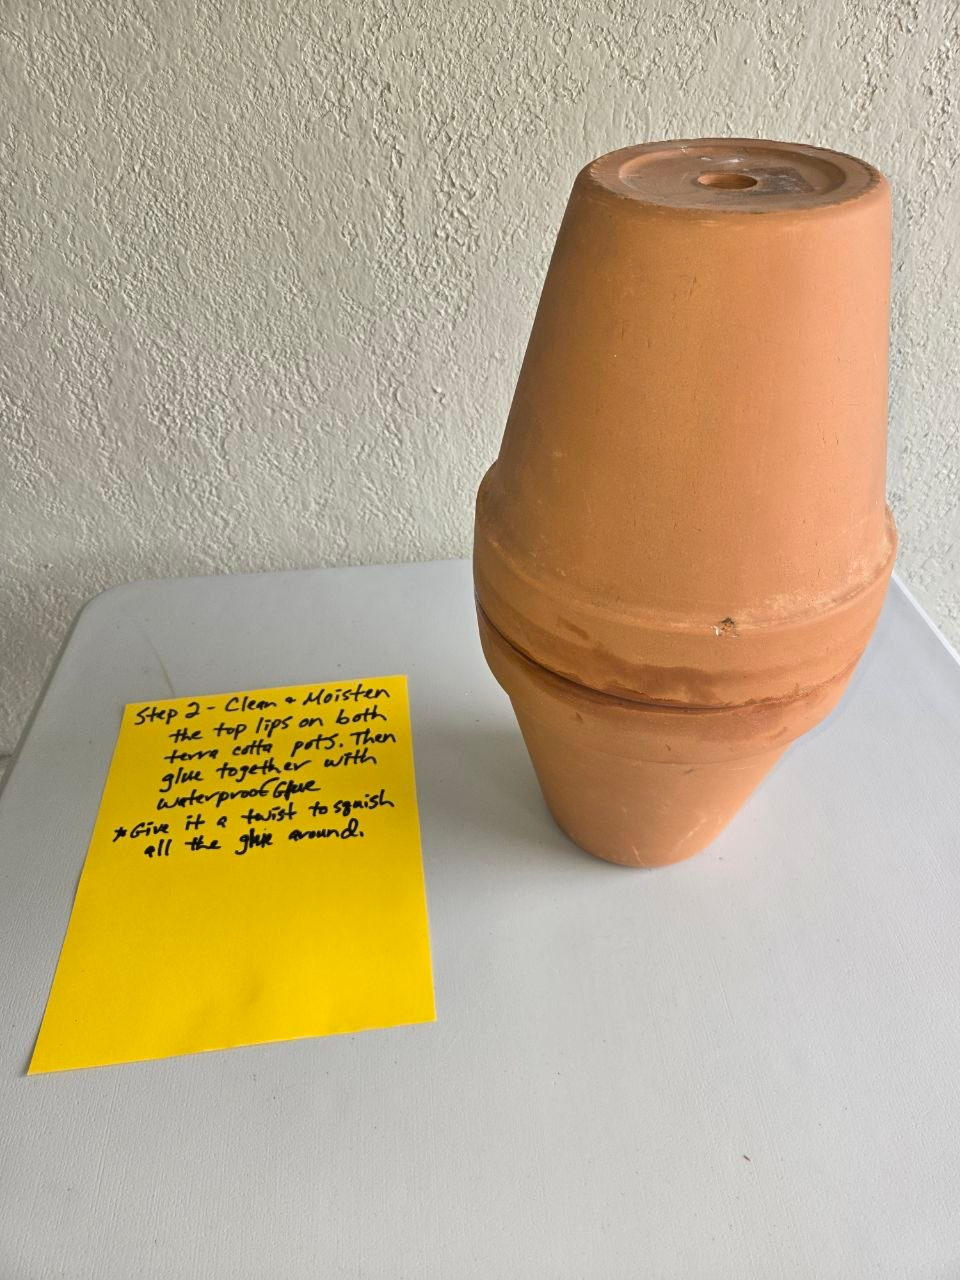
Press the pots together and let the glue cure so you end up with one buried water reservoir.
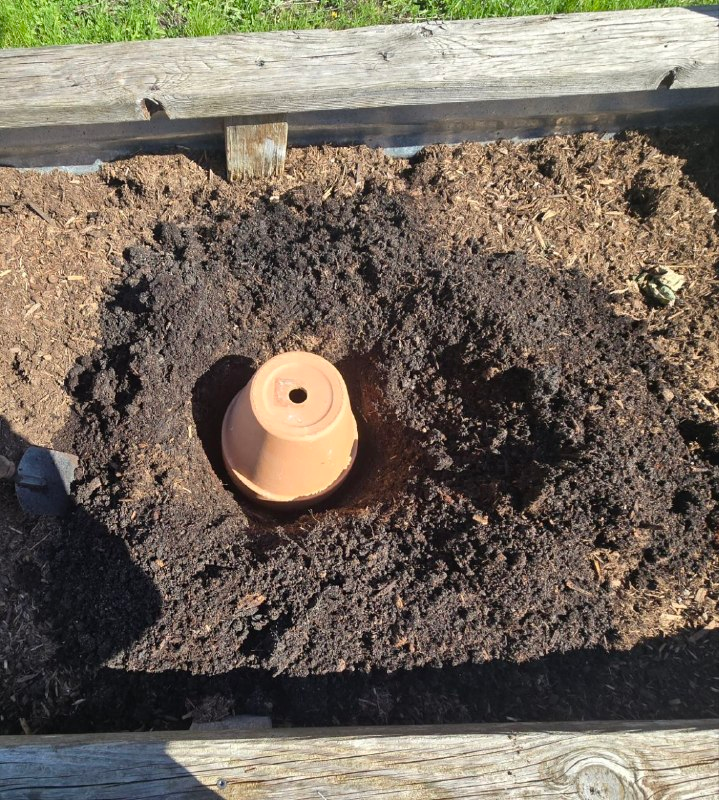
Dig a hole deep enough to bury about three-quarters of the olla.
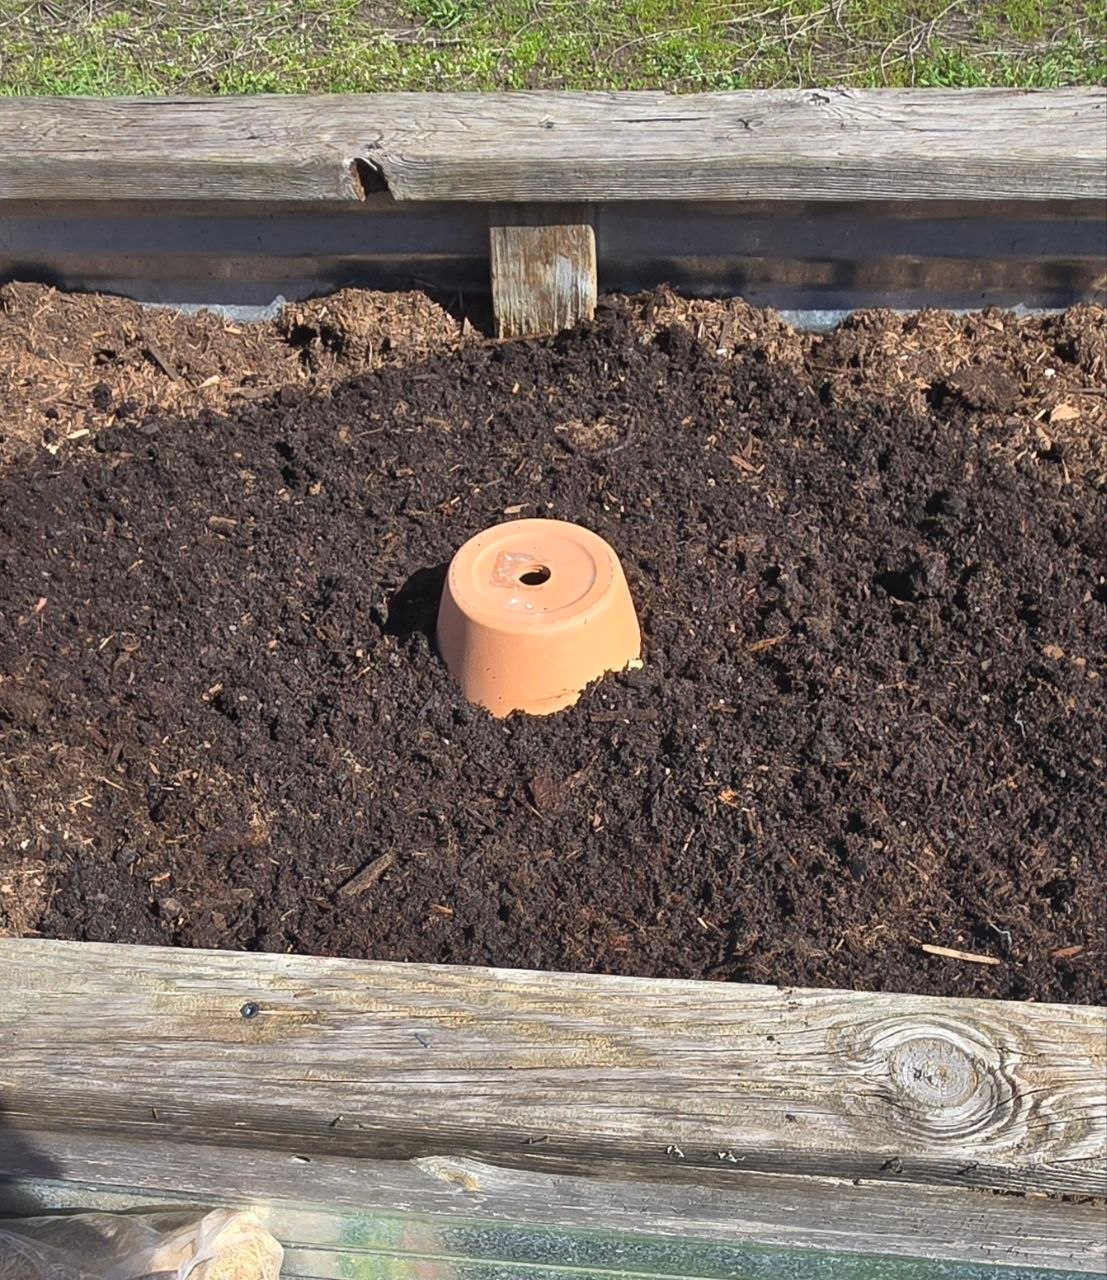
Set the olla in the hole and backfill around it, leaving about 2 to 3 inches above the soil.
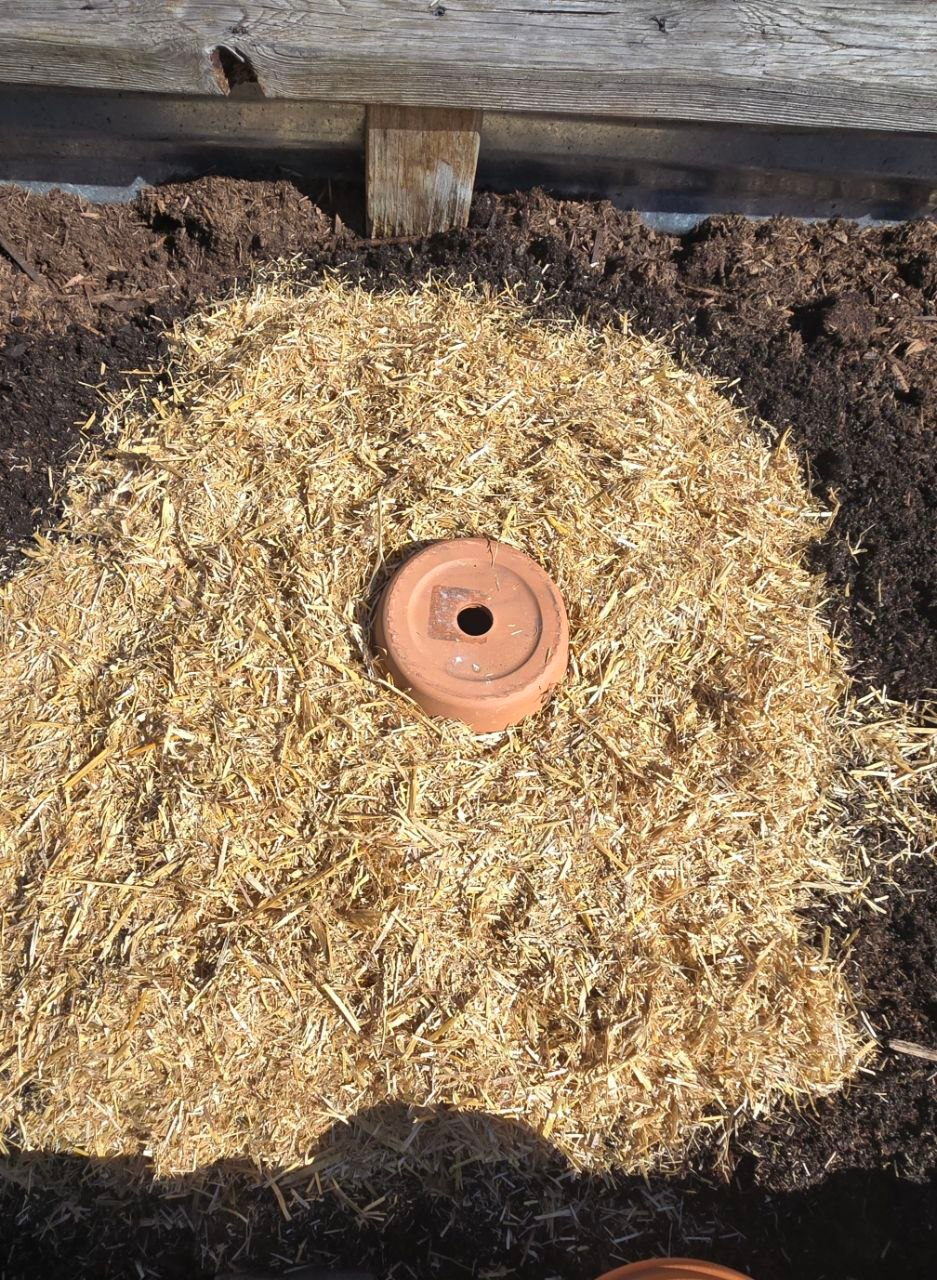
Place straw or mulch around the buried olla.
Fill the olla with water.
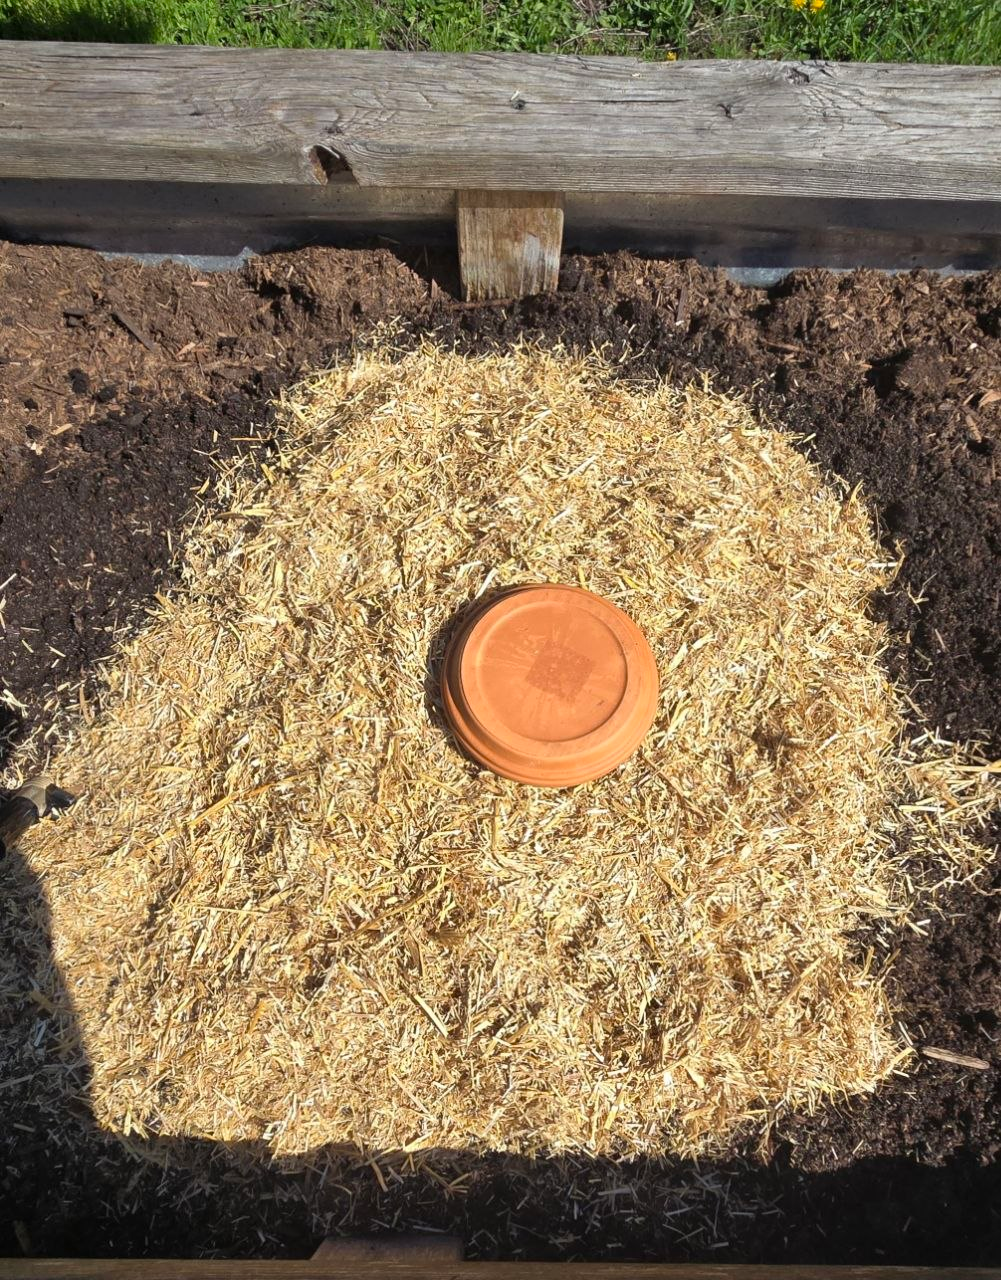
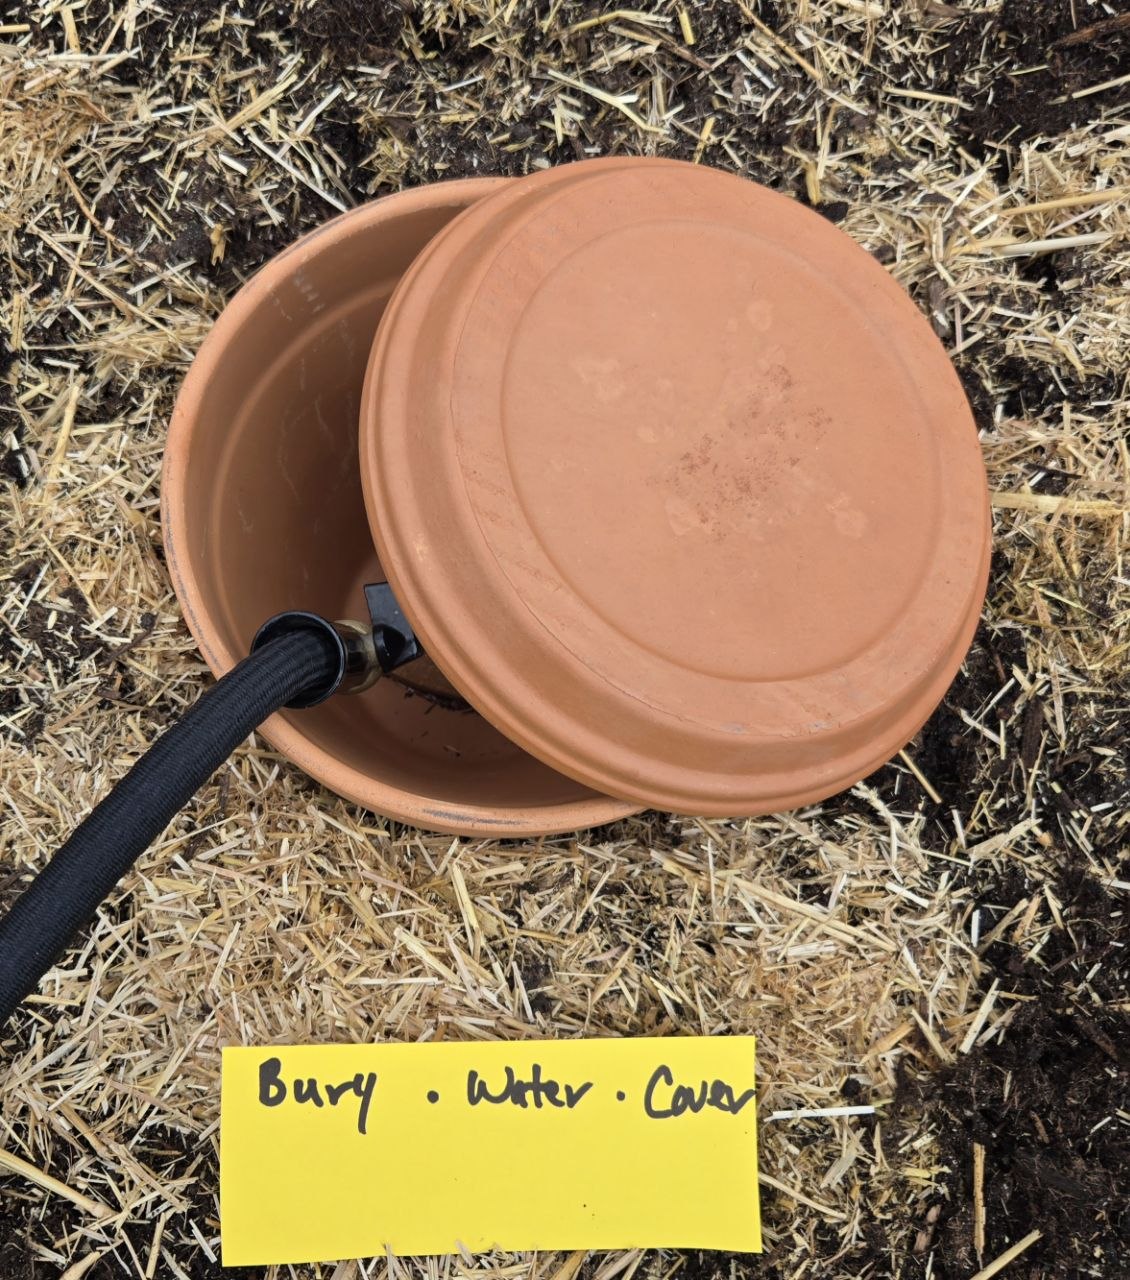
Place a lid on top.
It really is as easy as burying 1 unglazed terra cotta pot. Make sure the pot is unglazed, because glazed pots will not let water seep through properly.
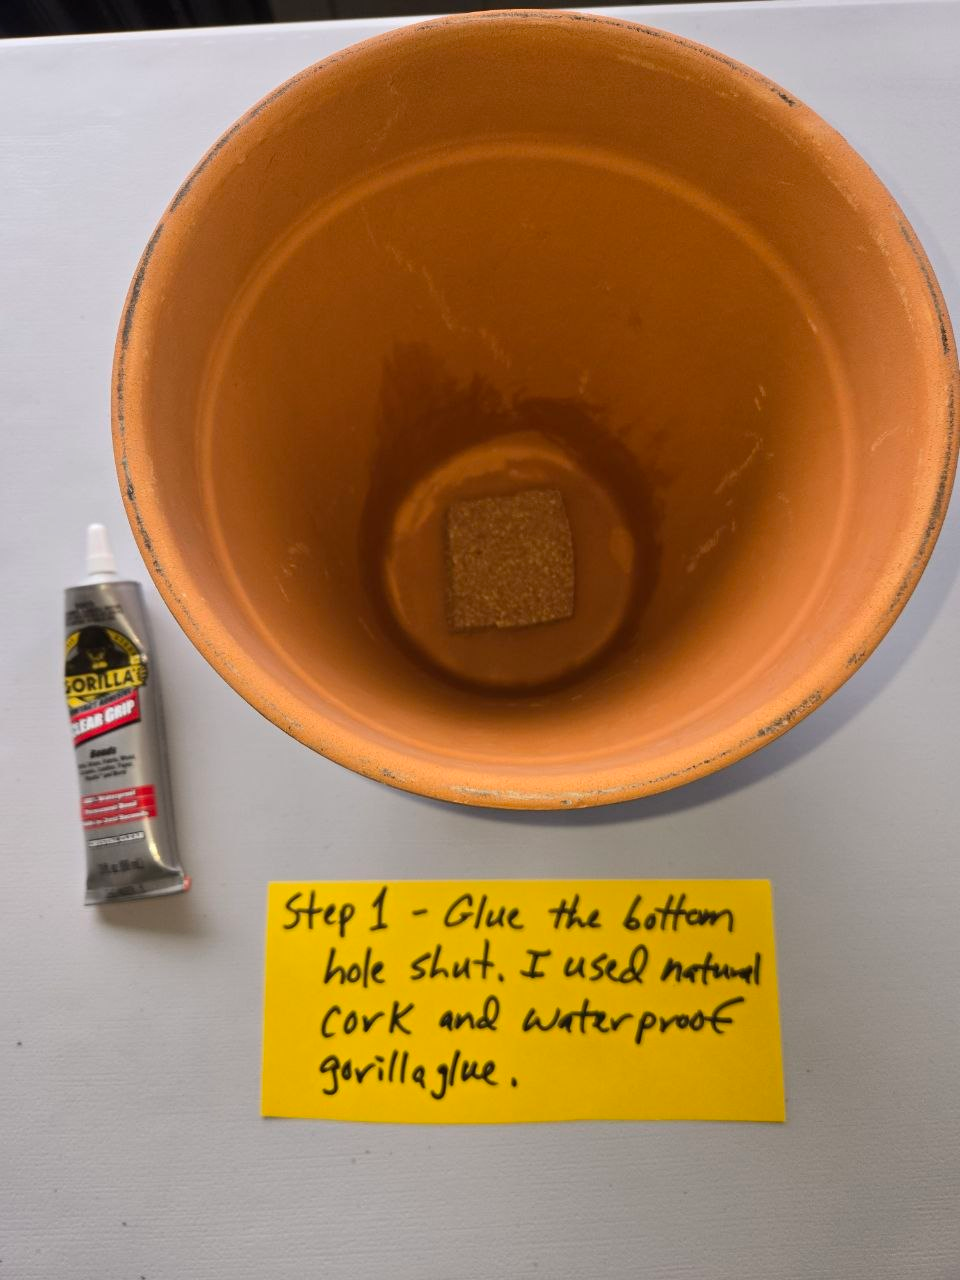
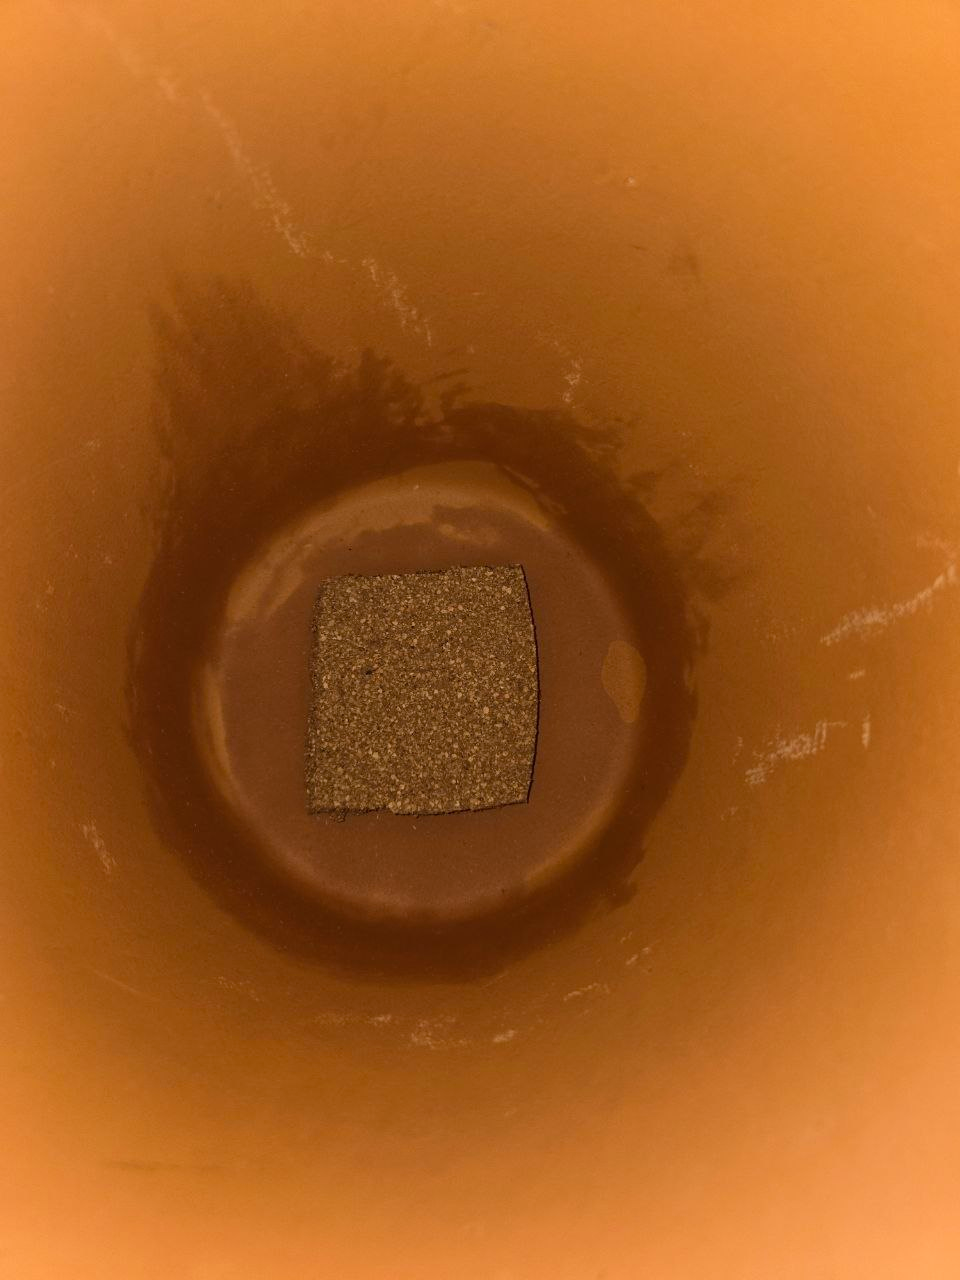
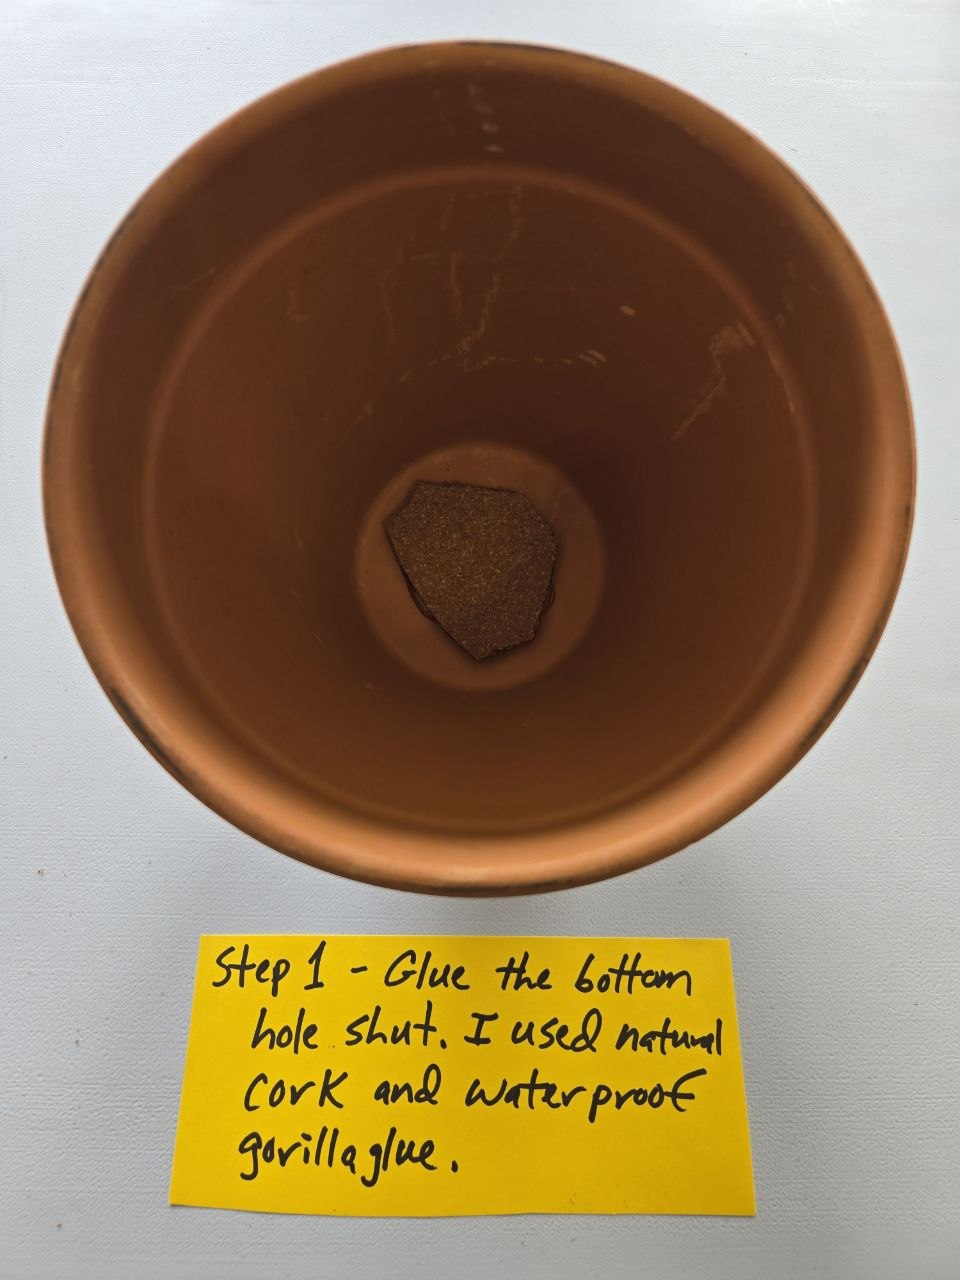
First, glue the hole in the bottom shut. I used a piece of cork and waterproof Gorilla Glue, but you could also use a piece of tile or a flat rock as long as it seals well.
Then bury the pot, leaving about 1 to 2 inches sticking out above the dirt. Fill it with water and cover it. I used a planter base for a lid.
Keeping it covered helps reduce evaporation, keep debris out, and help stop mosquitoes from breeding inside the pot.
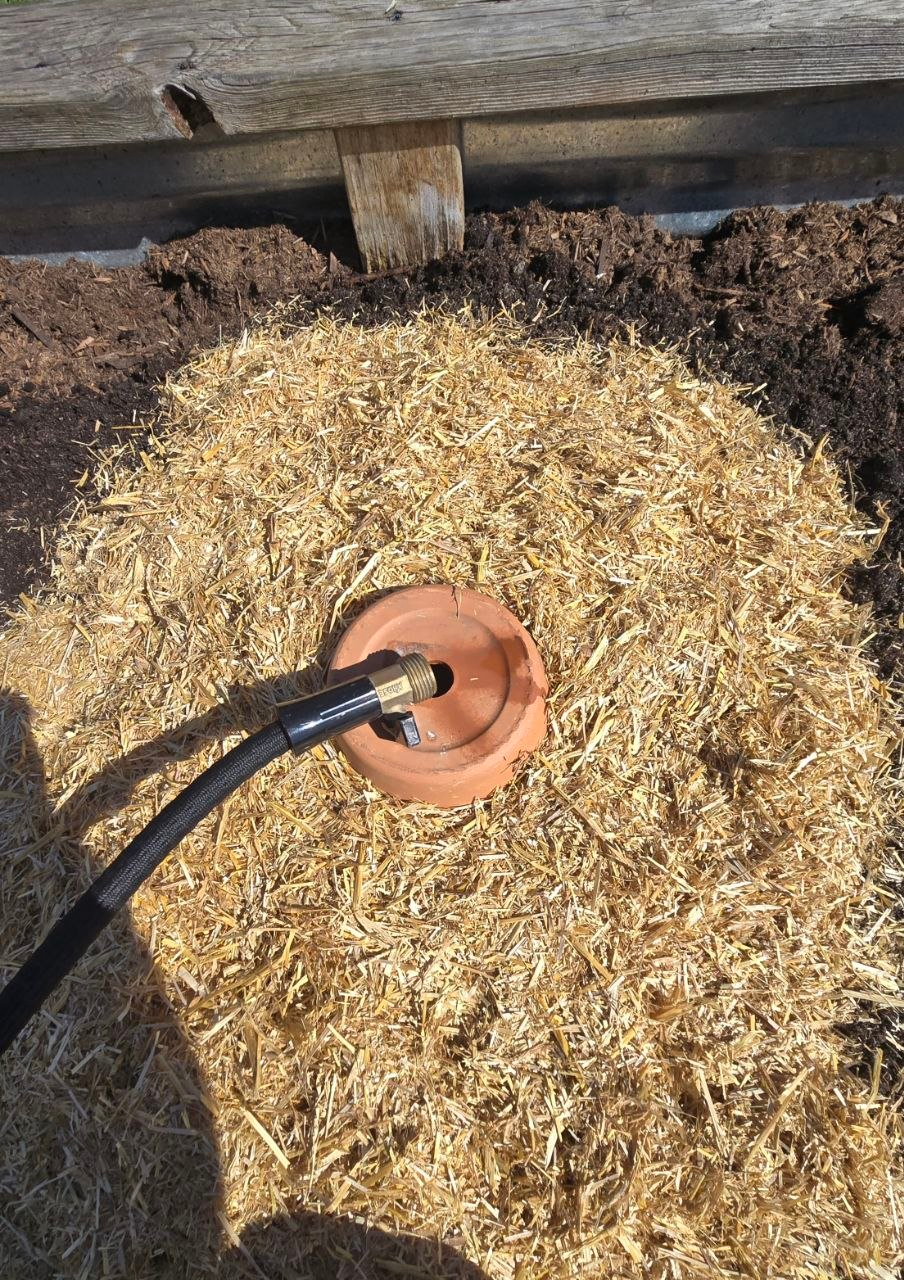
To help retain moisture even more, mulch around the whole planter right up to the top of the pot.
One important thing: water your bed completely first, then fill the pot. The olla works best as a steady moisture helper, not as the only first watering for bone-dry soil.
You cannot really overwater with the pot itself, because the water will not seep out unless the soil around it is dry and the plants need a drink.
This simple setup will usually water about a 1 to 2 foot radius around the olla, depending on the soil and conditions. It works especially well in raised beds, vegetable gardens, smaller spaces, and around thirsty plants nearby.
Just refill the pot as needed. In colder climates, it is smart to drain or remove it before hard freezing weather if cracking is a risk.
Ollas are simple, but they solve a real problem. Instead of watering the whole surface every day, they slowly move moisture down into the root zone where it is actually useful. That can help raised beds stay more evenly watered and may help during hot dry stretches too.
More importantly for us, this is one of those backyard fixes that came directly out of getting something wrong, then trying again. I do not know yet if these will solve the problem completely, but they are practical, low-tech, and worth testing. We will find out by living with them.
If you like low-tech garden helpers, this also pairs nicely with our simple worm tube idea for feeding the soil.